Hey, readers! In this post, we share DIY ways to up-cyle your old clothes in time for spring: or any season for that matter. Woohoo!
Spring has nearly sprung, which means brighter, longer days, and for many, a much-needed therapeutic clearout followed by a miraculous cleaning spree. Ah, open the windows and welcome that reinvigorating spring air.
Whether your focus is mind, body, home, or wardrobe, spring is a beautiful time to get rid of the junk that no longer serves us, making room for the new.
But, in our haste to put our best foot forward, let’s not overlook that garment that appears like one for the junk pile. Instead, it could benefit from a little TLC: some new life breathing into it, if you will; another lovely aspect of spring.
Instead of trashing that item of clothing in your hand, consider up-cycling it instead. Try the DIY up-cycling methods below to help you breathe new life into your wardrobe.
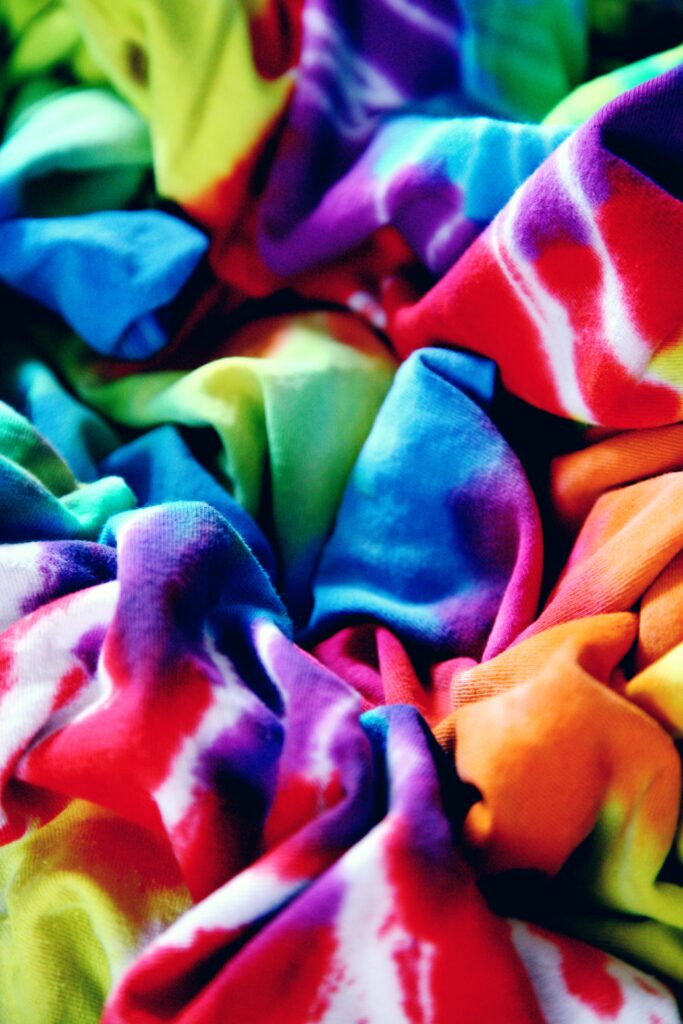
Release Your Inner Hippy
We’re talking, of course, about the magical world of TIE-DYE. Groovy, baby! Tie-dying is an accessible and affordable way to zhuzh up old clothes by hand. By tying together specific parts of your garment and then submerging it in your chosen dye, you can produce an eye-catching assortment of patterns.
Tie-dying works best on natural fabrics like silk, linen, and cotton. But you can still get beautiful results from synthetic-fabrics, providing the dye can bond with a specific synthetic fiber. A lighter-colored garment will also work best for this method, as the final hue will be more pronounced.
How To Get Started With Tie-Dye
Here are some items you’ll need to get started on your tie-dye journey:
- Your garment, so a t-shirt, scarf or sweatpants that follow the above recommendations, for example.
- Something to tie your garment, string, or rubber bands works well.
- A pack of dye in your chosen color
- A pair of gloves to protect your hands from the dye
- A bucket, container, or dye-proof sink
You will likely need some other bits, too. But this will depend on the instructions provided with your dye.
Final Tie-Dying Tips
Try experimenting with different tying methods to produce various patterns. You can also apply this dying method to soft-furnishings. Meaning you can up-cycle cushion covers, blankets, and more to get your home spring-ready.
It’s All About the Image… Transfer
If you want to take your colorful tie-dye garment one step further, try an image transfer. For those with heat-presses, sublimation works well if you do the process in reverse. So first transfer your sublimation t shirt design, and then tie-dye.
Although, be mindful that sublimation works better with 100% polyester fabrics. Meaning a compromise with garment fabric is required to get the best results when combining these processes.
Final Image Transfer Tips
Suppose you don’t have a heat-press, no dramas, folks. You can use heat transfer paper or Heat Transfer Vinyl in conjunction with your household iron. Woo! Unlike sublimation, you would do this process after tie-dying.
If tie-dying isn’t for you, both sublimation and heat transfer paper/vinyl work as stand-alone methods. Image transfer medium or self-adhesive vinyl decals are two other fun stand-alone image transfer techniques that work well with most fabrics.
Photo by Sharon McCutcheon on Unsplash
Leave a Reply