Since moving house my sewing machine hasn’t been out anywhere near enough. I have so many projects that I keep meaning to complete, but as usual there just aren’t enough hours in the day. Or enough space on the singe table that we have in our living room. I know that it’s only a matter of time though, and then I’ll finally be able to crack own with some of the things I want to make. There must be patterns that I bought over a year ago that I haven’t even made a start on yet. And the less said about the cot bed quilt that I started a lifetime ago the better.
When Little Miss C first came into my life one thing that I was desperate to do with her was teach her to sew, knit and crochet. The fact that she is left-handed has kind of hampered the hand sewing side of things, simply because I have found myself really struggling to get to grips with how to tell her to hold everything. Combined with the fact that we’re both rather impatient. Machine sewing is something that she’s always wanted to have a go at, but until now I’ve always been a little bit hesitant to let her have a go on my sewing machine.
Recently though she attended a girl in her class’ birthday party and it was a craft party hosted at her house. Amongst the various things that they made that day were little lavender bags. It’s fair to say that Little Miss C was absolutely buzzing when she brought hers home with her. It was an incredibly simple project, but it meant so much to her that she’d made this lavender bag herself. It was therefore perfect timing to be asked to review the Great British Sewing Bee Sewing Studio with her, and boy was she excited when I showed it to her.
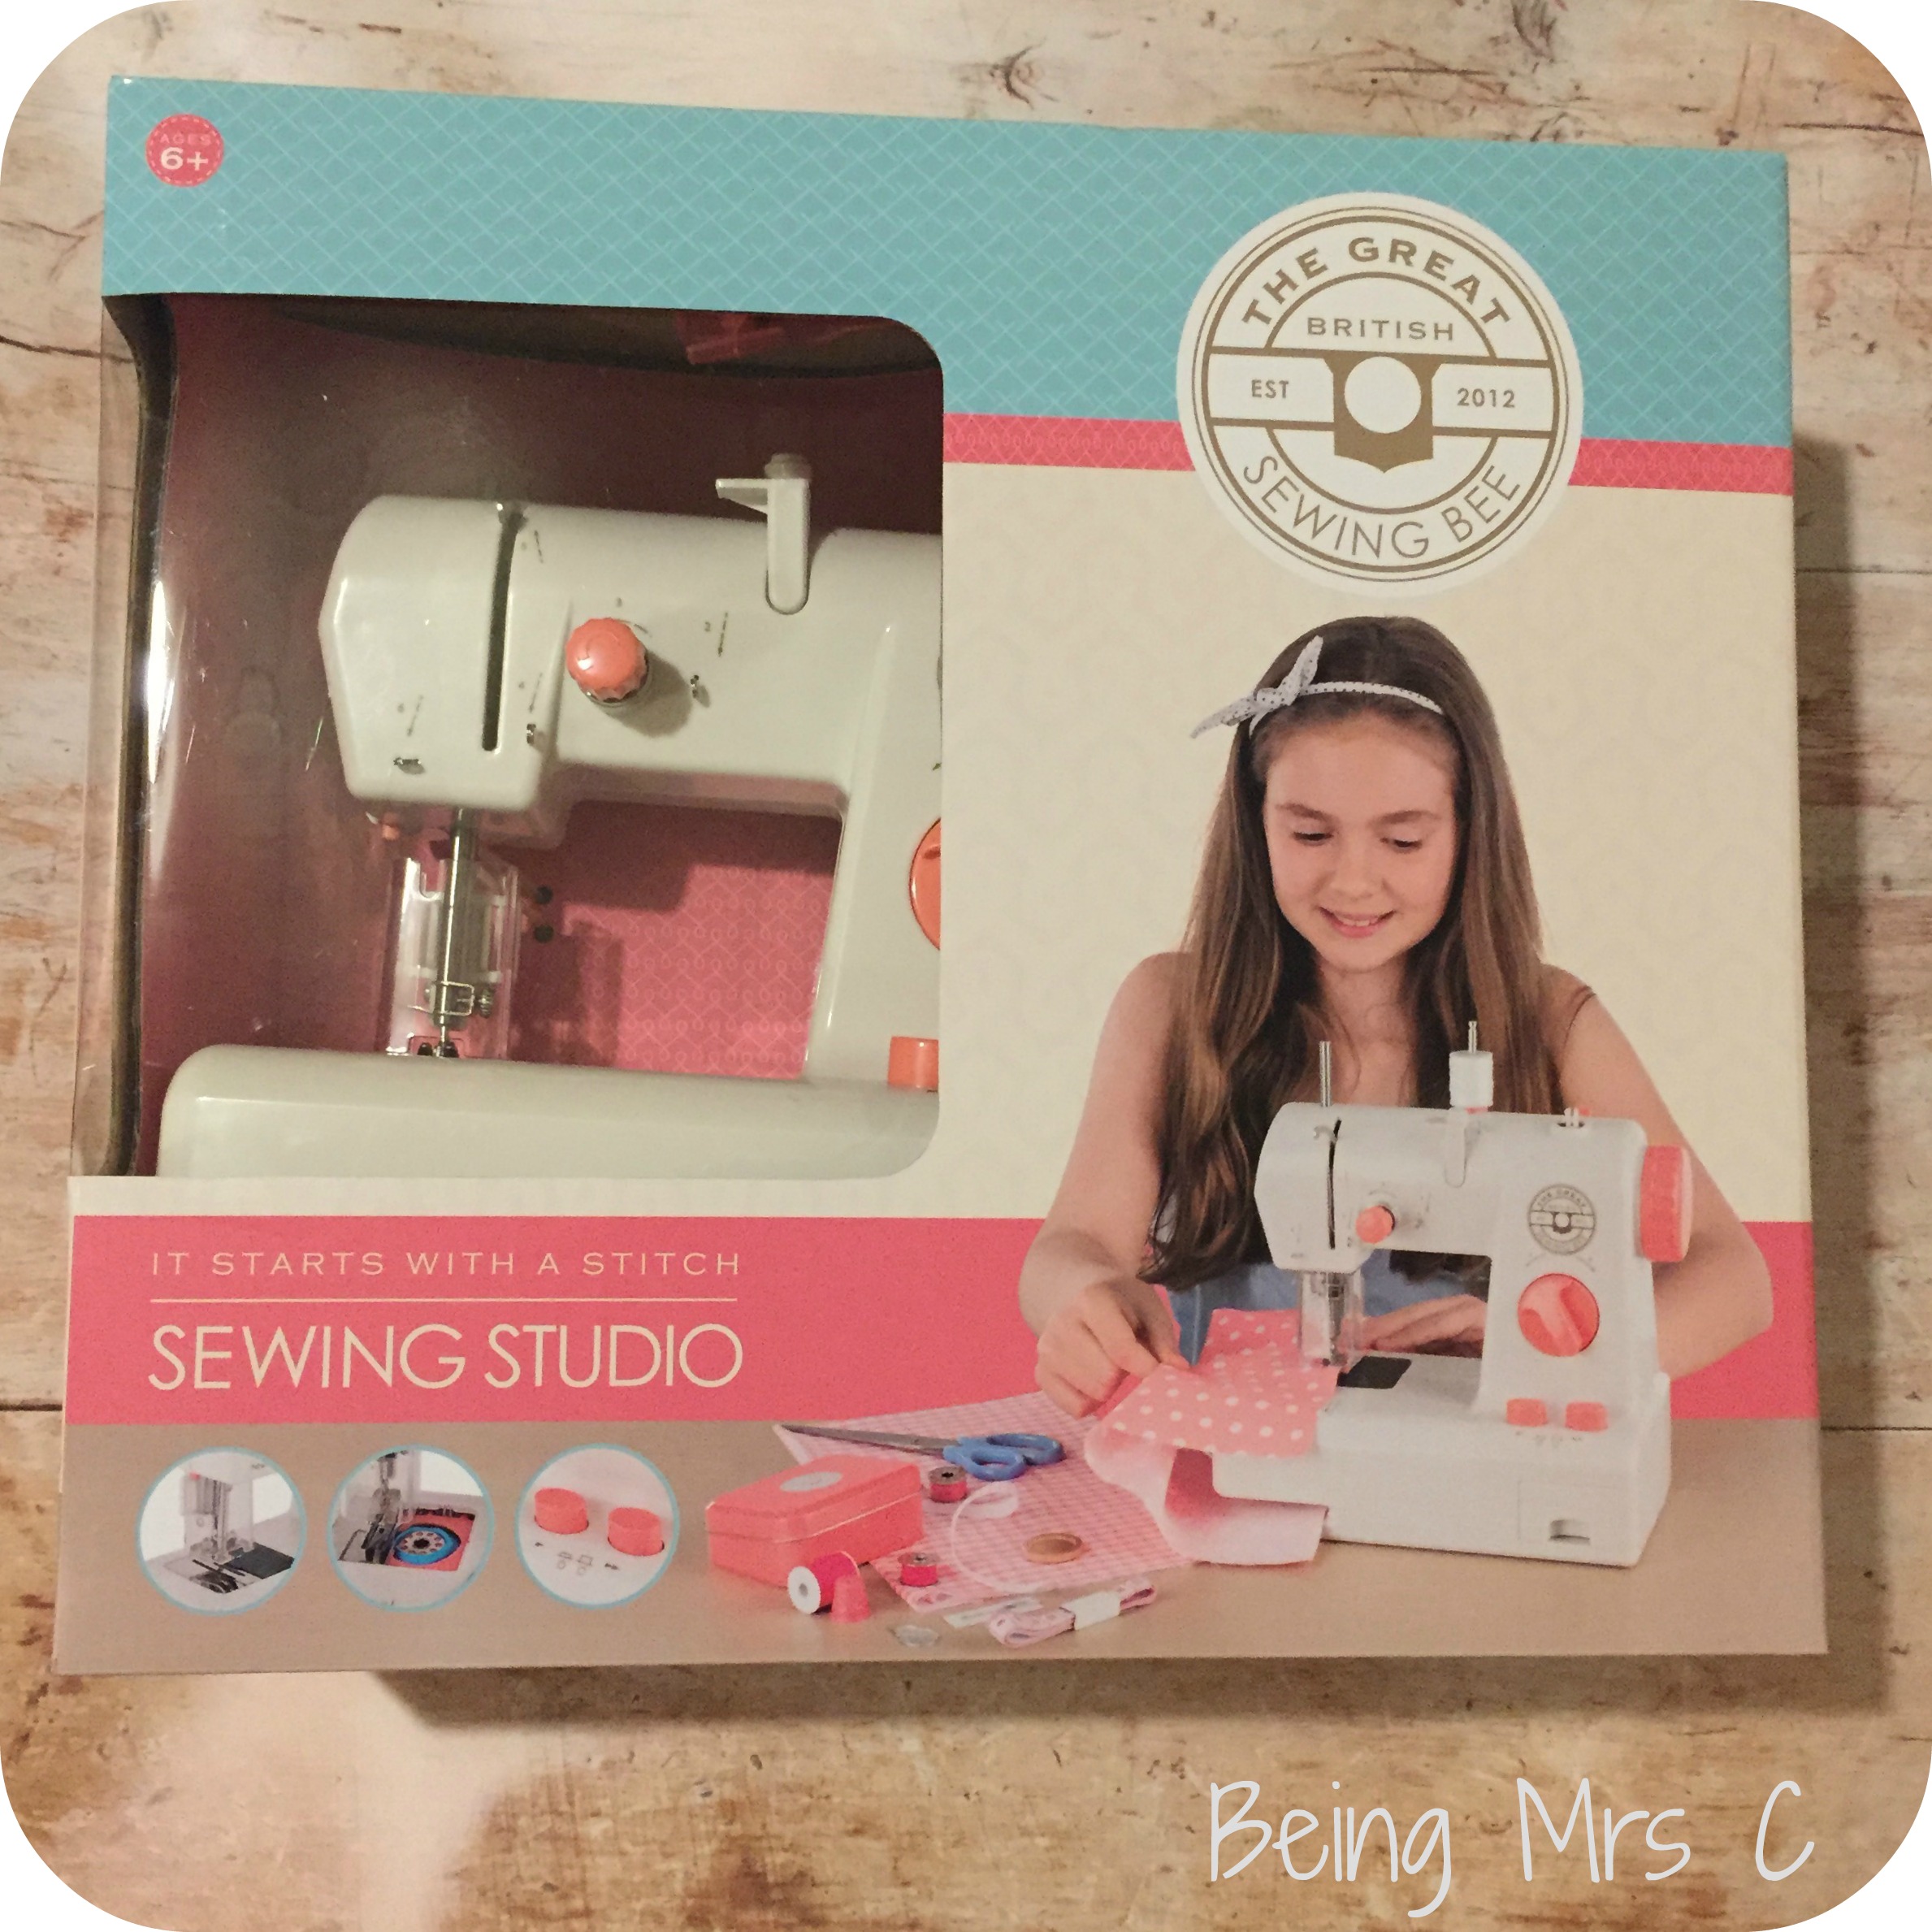
The Great British Sewing Bee Sewing Studio consists of a small electric sewing machine and a clutch bag sewing project. I’ve heard mixed things about small sewing machines designed for children before, but I was intrigued to try one for myself to see how it compares to using a full sized machine.
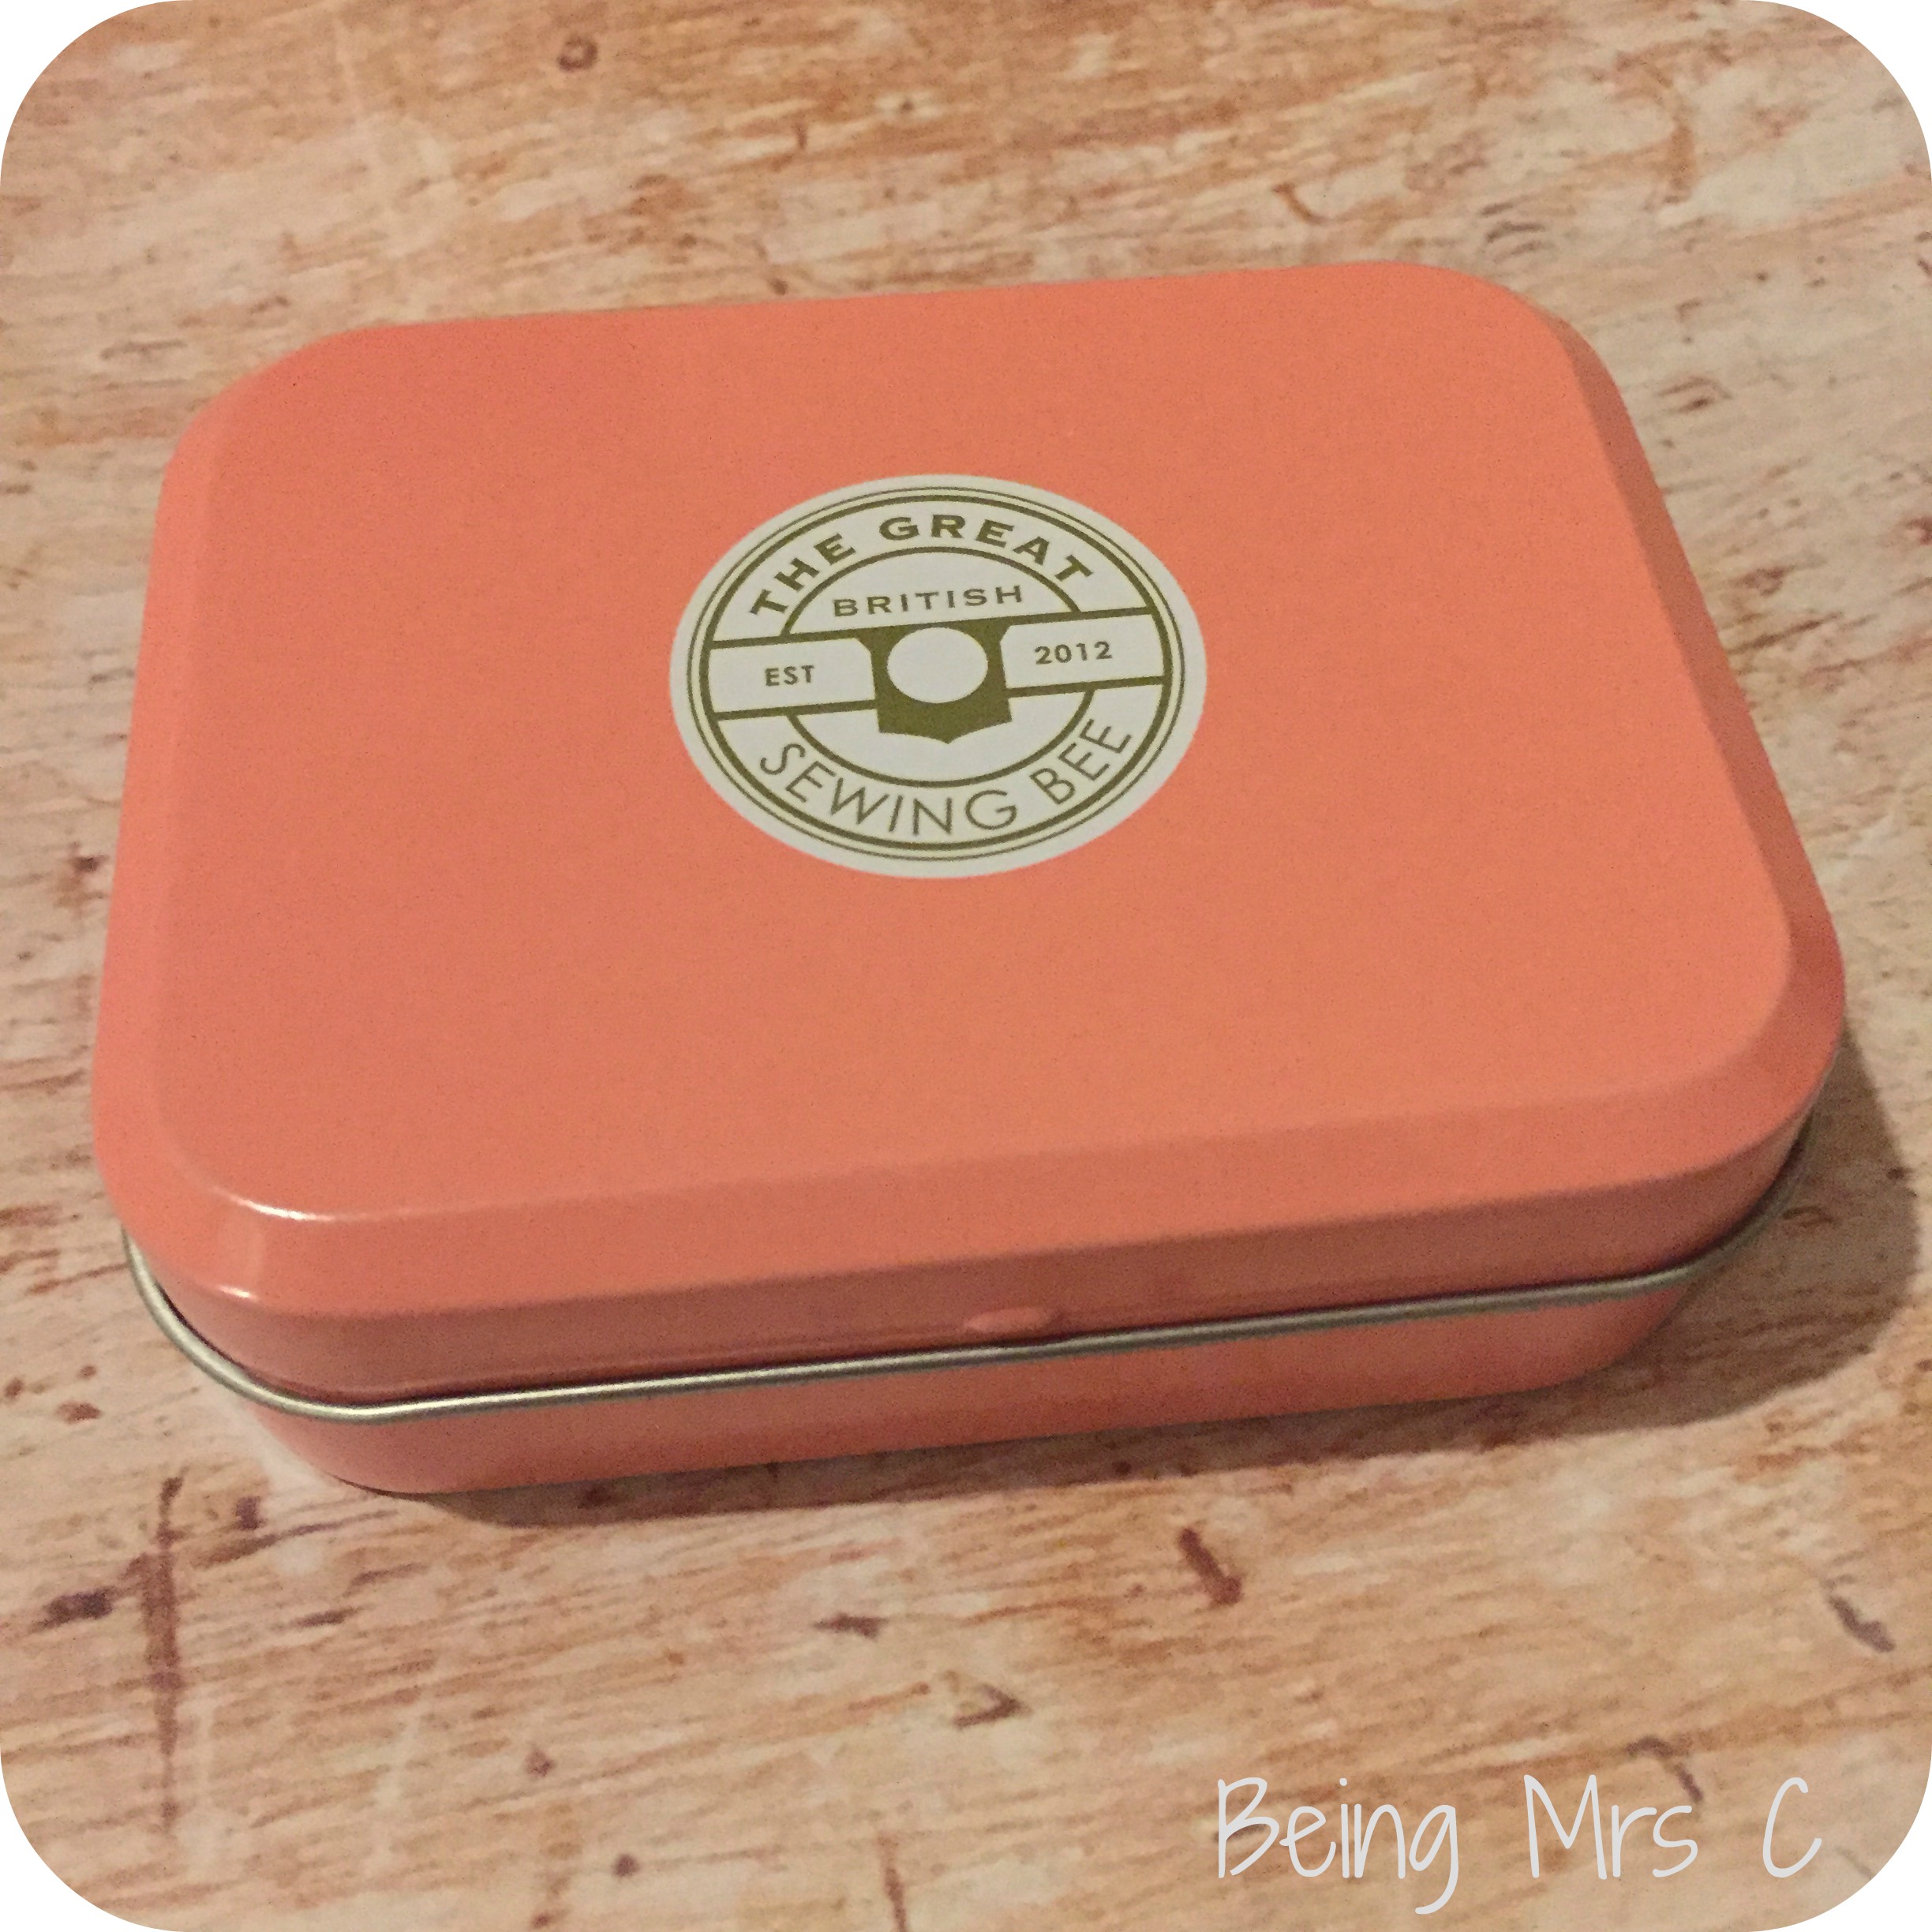
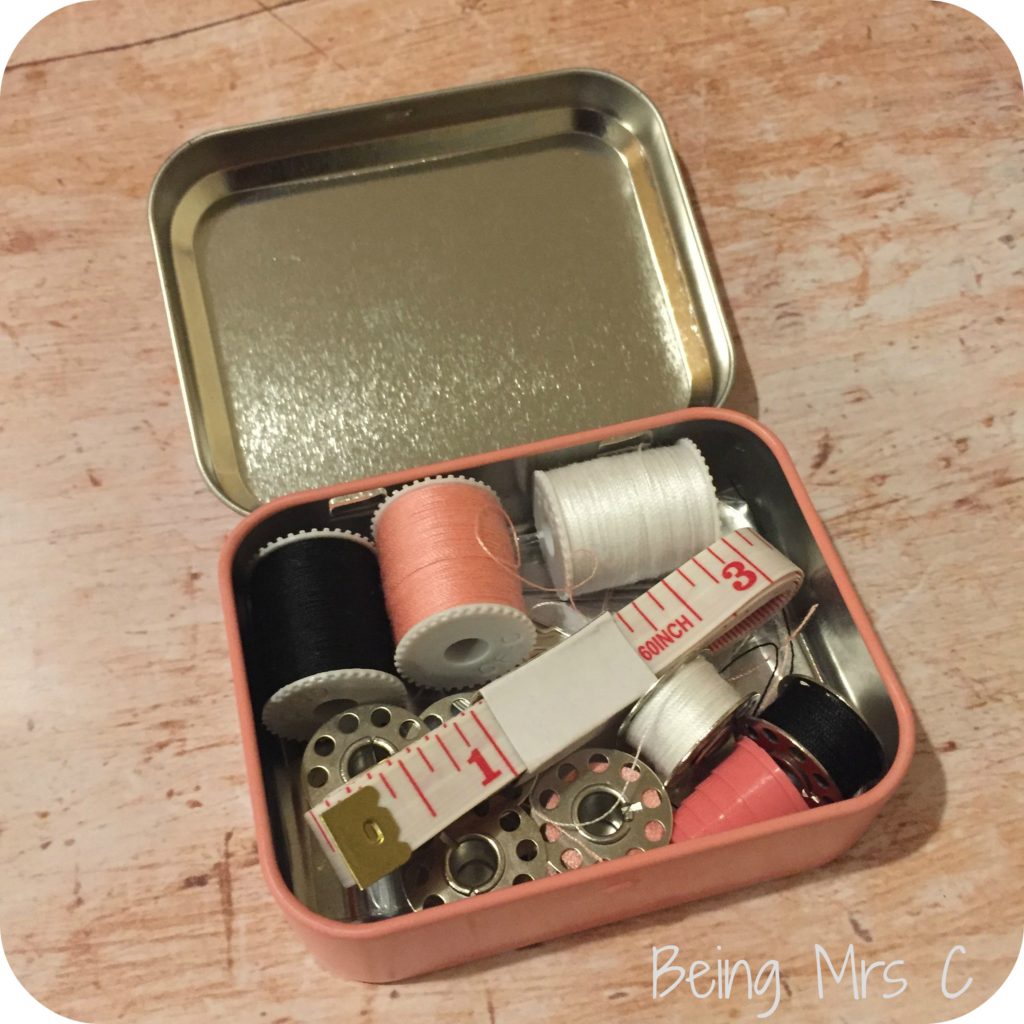
The Sewing Studio also comes with a small sewing tin full of sewing notions which includes metal bobbins, thread spools, some pins, a needle threader, a hand sewing needle, a tape measure and a couple of spare sewing machine needles. It’s a shame that the tin didn’t also include a small set of scissors, but you go get a larger set of scissors in the cutch bag sewing project that I will come to later.
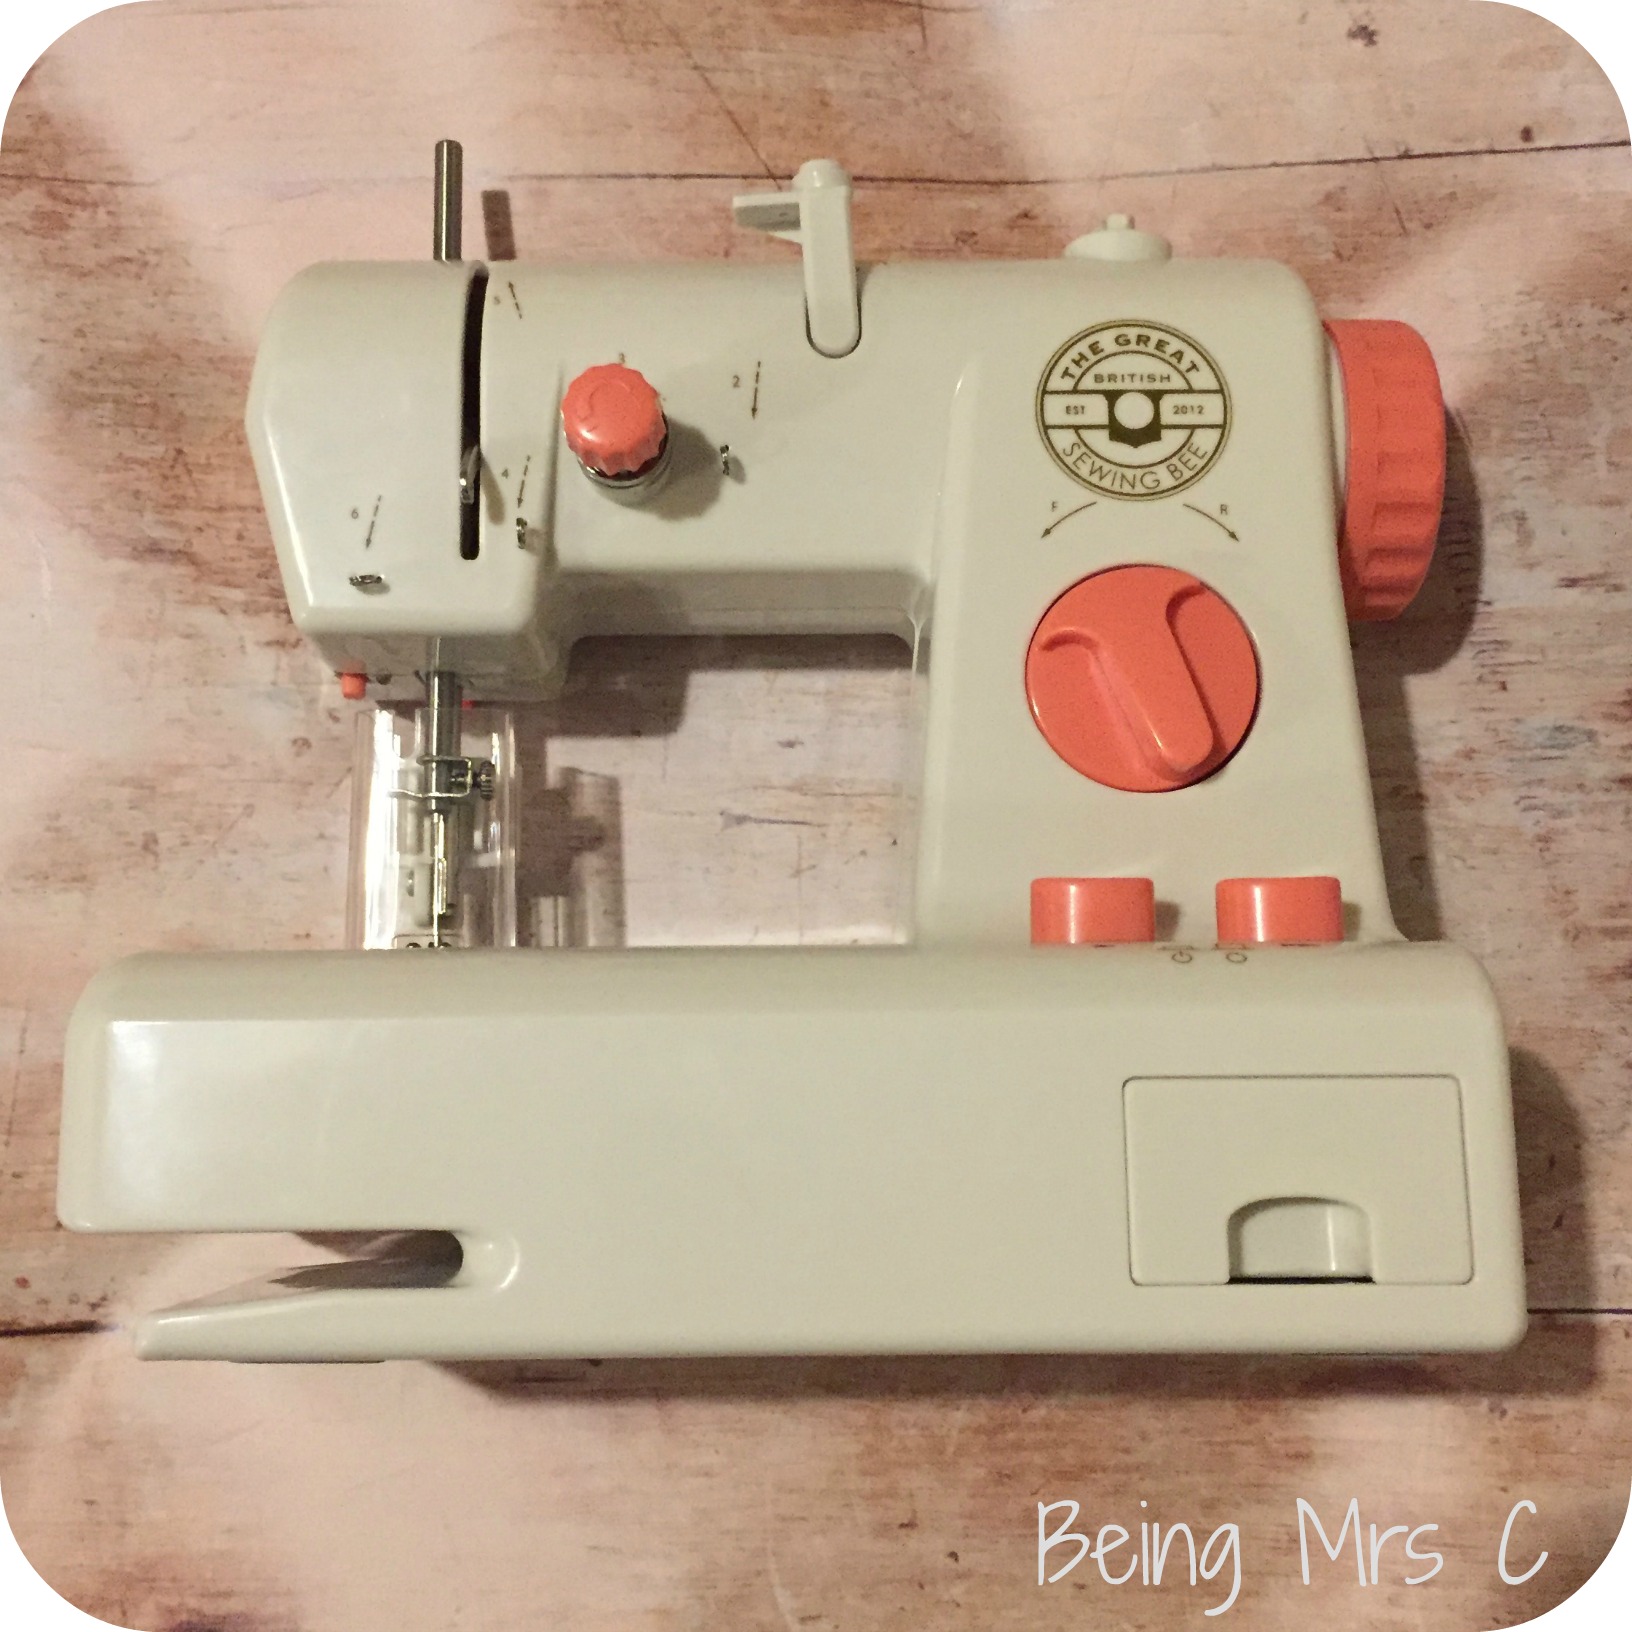
The sewing machine itself can be powered by either 4 AA batteries (not included) or from the mains. The big advantage of using batteries is that you can place the machine wherever you want without having to worry about how close you are to a plug. It also means that you don’t have to worry about tripping over any cables or your children playing with anything connected to the mains. I mainly use rechargeable batteries at home, but I’m guessing if you were doing a lot of sewing on the machine you’d probably get through batteries quite quickly.
With it comes to the functionality of the sewing machine, there’s everything that you would expect of a simple model. The fact that the machine can only do running stitch is I suppose one limitation over a simple full sized machines as I believe most of those also allow you to do zig-zag stitch.
To thread the machine, all the things you need to do are actually numbered on the machine – making it reasonably straightforward to know where the thread is supposed to go next. What I did notice though is that it was actually quite tricky to thread some of the bits – somehow seeming tricker that my simple Brother machine – and LMC didn’t quite have the dexterity to be able to do it on her own. I’m a pretty experience sewing machine user so I knew what I was doing and when something didn’t seem quite right, but I think it might have been a bit harder if you were unfamiliar with sewing machines.
On the machine you can use a large knob on the front to adjust the stitch length and a tension screw. What I found slightly confusing at first was the fact that the stitch length adjustment knob is what is also used to select reverse on the machine.
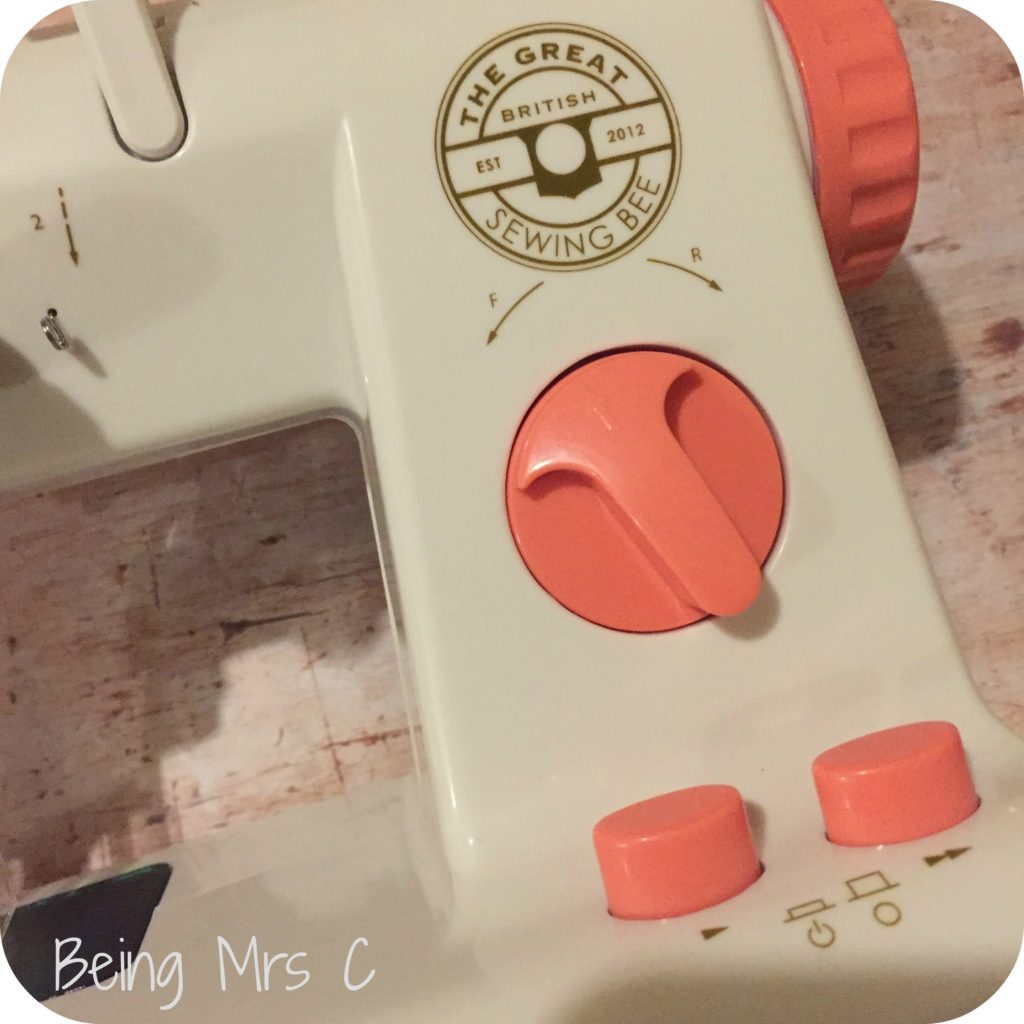
There are two ways to sew with the machine, either by attaching a traditional foot pedal, or by using one of two switches on the front off the machine. These buttons allow youth use the machine in auto sew mode and offer two different speeds. Basically you press the corresponding button for the speed you want and then press it again to turn it off when you’re done. It’s basically an on off switch. To be this was just a really weird concept, but I guess I’m just used to using a sewing machine and the whole idea of using a foot pedal, but LMC found the idea of on off buttons far easier to comprehend and couldn’t yet get the co-ordination of using the foot pedal. So I guess that means that including both options is the right thing for a child’s sewing machine.
The bobbin compartment on the machine is located flat next to the presser foot. Far easier for children than having to insert a bobbin vertically.

The instruction book that comes in the Great British Sewing Bee Sewing Studio explains how to thread the machine, alter the stitch length and tension, winding the bobbin and even changing the needle in the machine, but the thing missing from it is how ti actually sew with the machine. There’s talk of how to use either the pedal or the auto sew mode switches, but there is nothing in there at all about where to place the fabric, how you should put the presser foot down etc. It’s all standard stuff for anyone that already knows how to use a sewing machine, but if an older child was trying to have a go on their own, or the helping adult wasn’t already familiar with machine sewing then I think it could be quite difficult for them. When using the machine I found that you needed to get the tension just right as otherwise I found that the thread could end up quite knotted.
The Clutch Bag Sewing Project that comes with the machine comes with its own instruction booklet and paper pattern, as well as some fabric and a button and bit of ribbon for the fastener on it. The instructions are clear in terms of telling you what to do, but again there are no instructions as to how to actually sew, it just says things like “sew along the sides”. Fine if the adult helper knows what they are doing, but hard work if they don’t.

One thing that does really strike me with the Great British Sewing Bee Sewing Studio is how girlie it is. The machine itself is white in colour, but with pink knobs and buttons. The clutch bag project includes pink gingham and pink with white spots on it. The Great British Sewing Bee itself has shown us that men do sew, and sew very well in some cases. It just seems a shame that this isn’t reflected in the way the Sewing Studio is presented. Other projects in the Great British Sewing Bee range are more targeted at boys, but not this one it seems. A shame.
The Great British Sewing Bee Sewing Studio is available to buy online here and has an RRP of £49.99.
Disclaimer: We were sent the Great British Sewing Bee Sewing Studio for the purposes of this review. All opinions remain my own. This post contains affiliate links.
A friend who knows I sew, asked me to pick up the bobbin thread on her daughter’s GBSB machine. The YouTube GBSB video says align the bobbin thread with the upper thread across the hole where the needle goes in and out when sewing. When I pull the bobbin thread across the hole, it still does not pick up the bobbin thread. The instructions with the machine are not comprehensive.
With your help, maybe I can help my young friend.
Thank you
June Gilmore
jpejpg29@gmail.com